If your rules don’t show expected objects, see Troubleshoot missing objects.
Types
Rules are instructions that automatically tag objects into zones or labels. Think of them as the “how” behind the tagging process.- Object rules target specific objects and their related objects through “expansion”
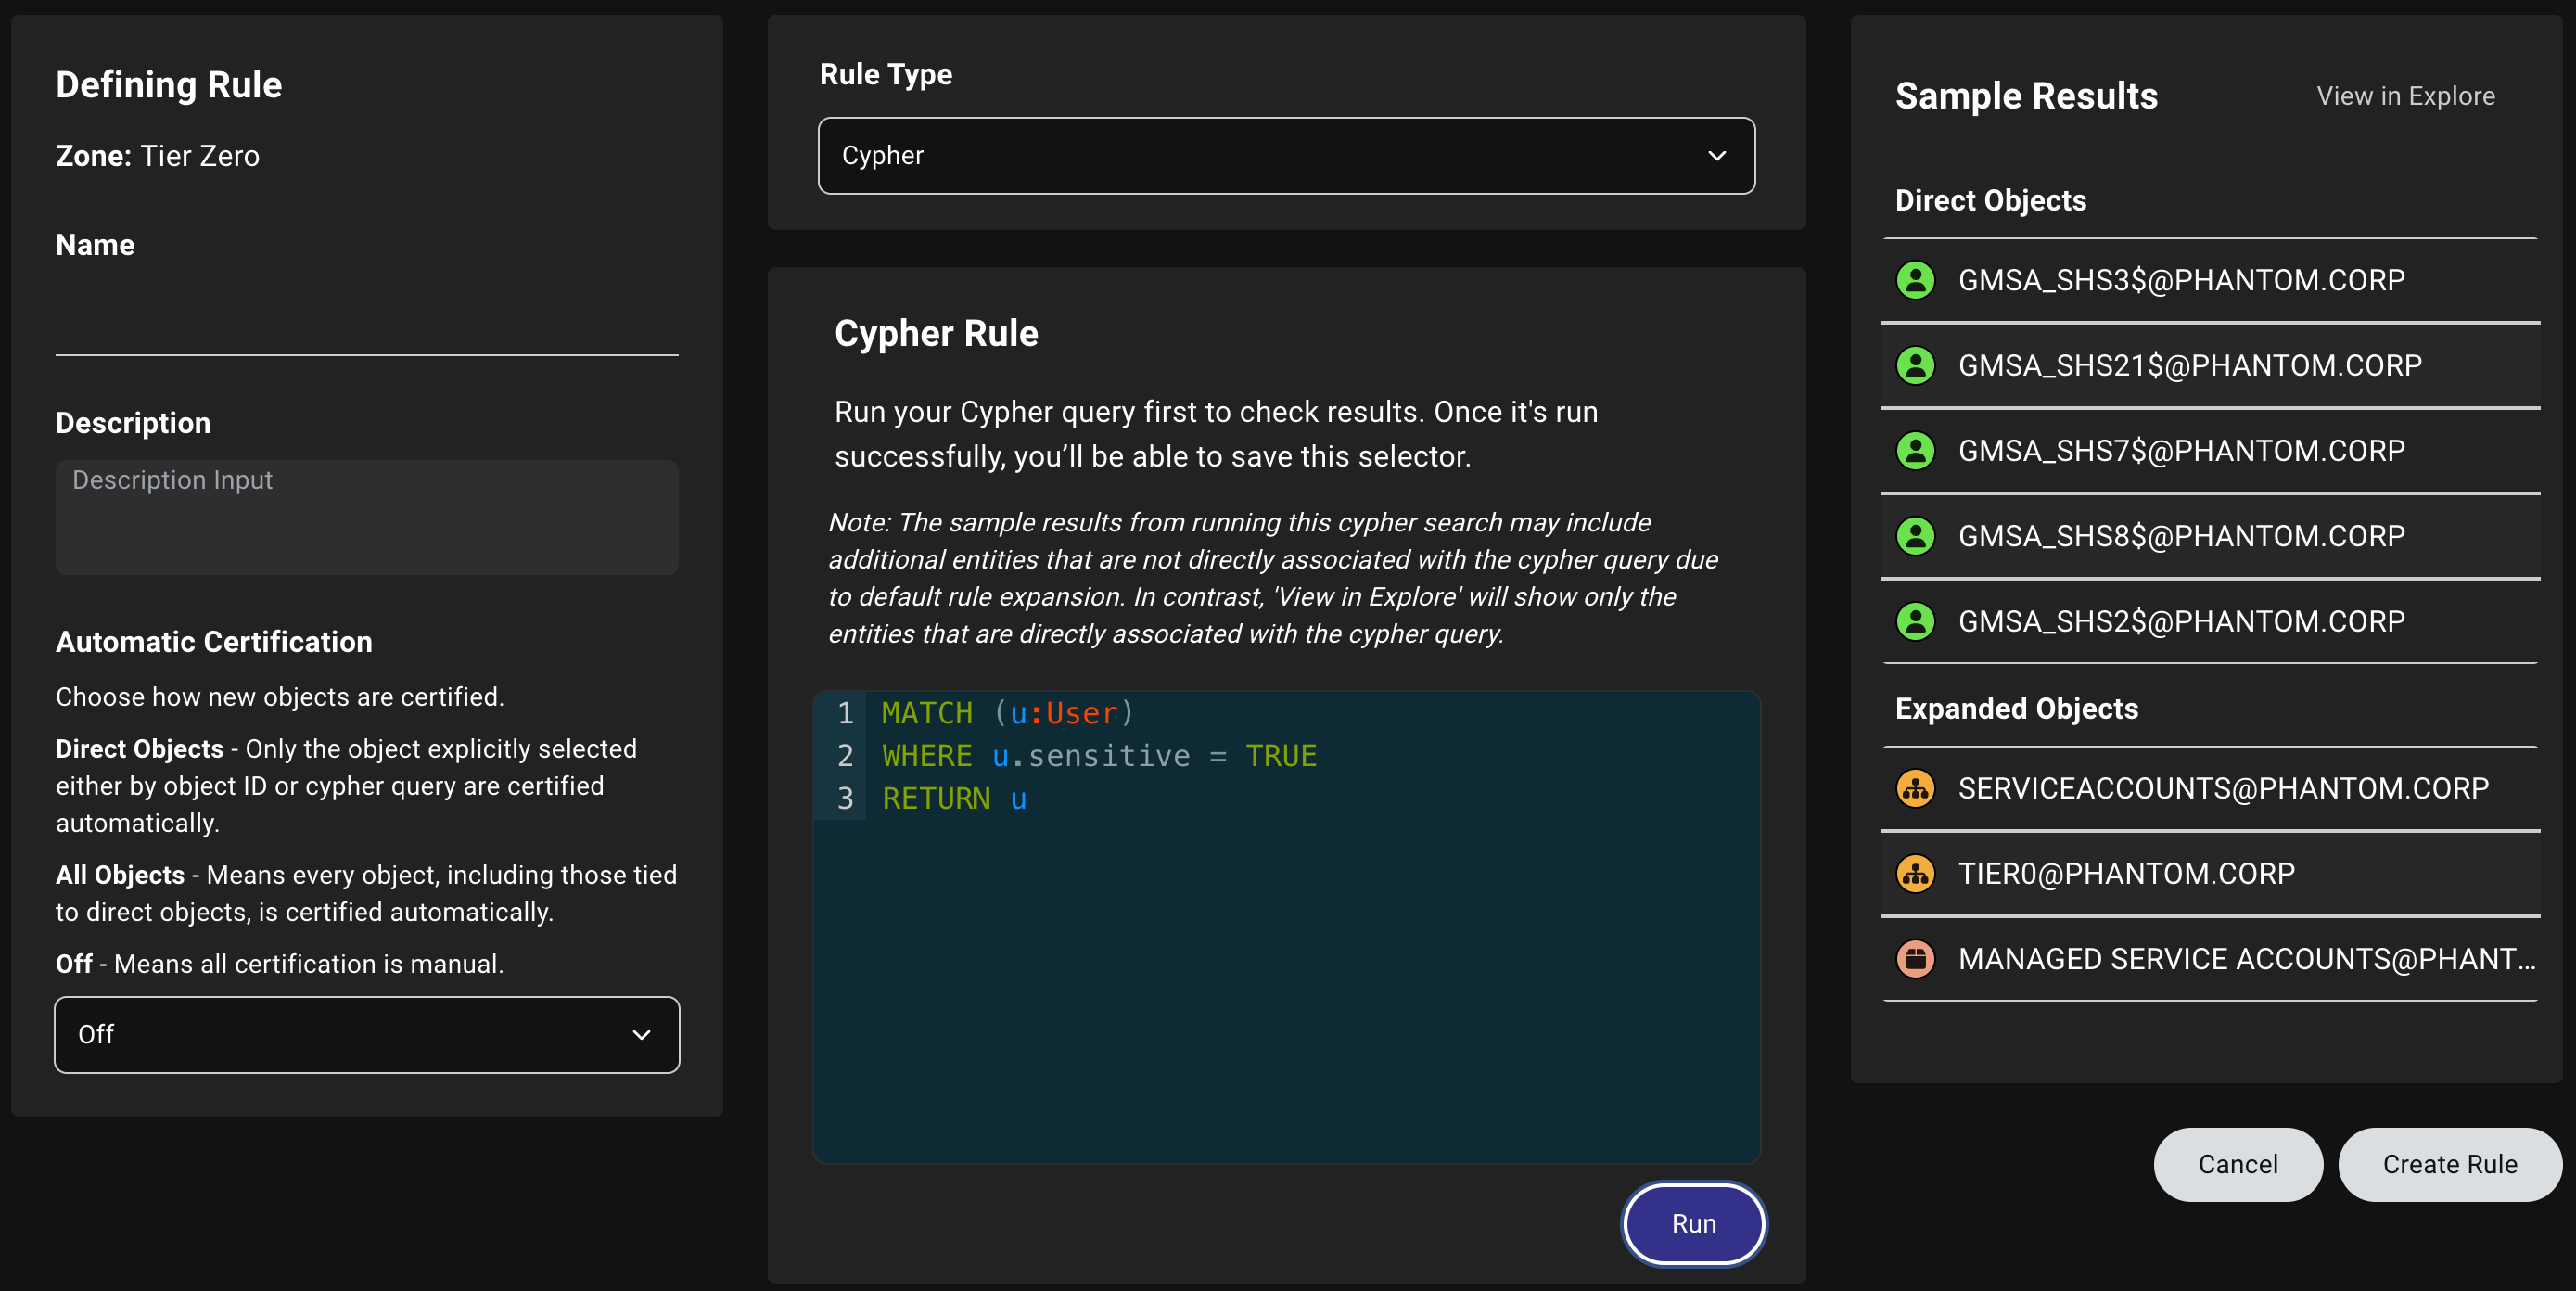
- Cypher rules tag objects based on custom query results
- Default rules are system-managed and tag critical objects automatically
Rule expansion
Rules automatically include related objects based on the type of object that you select, expanding through relationships to tag additional objects (some exceptions apply). This “expansion” saves you time by tagging entire groups or organizational units at once. The following sections describe how different object types expand during the tagging process.Group-like expansion
Objects that behave like groups in Active Directory include all contained members within the zone/label. These include the following type (edge) relationships:- Group (
MemberOf) - AZRole (
AZHasRole,AZRoleElligible) - AZGroup (
AZMemberOf)
Structured expansion
Objects that provide structural organization include all contained objects within the zone/label. These include the following type (edge) relationships:- Domain (
Contains)For non-default rules only. - OU (
Contains) - AZSubscription (
AZContains) - AZManagementGroup (
AZContains) - AZAdministrativeUnit (
AZContains)
Control of tagged object expansion
During the tagging process for zones, the final step involves tagging all objects that contain (or provide external control of) the selected objects. For example, in Active Directory this means that all OUs, Containers, and GPOs that apply to any Tier Zero object are also tagged to the Tier Zero zone. If any OUs or Containers are tagged in the last step of the tagging process only (not because you explicitly selected them), the process won’t expand to tag other contained objects.Define a rule
The process and screens for creating and editing rules is nearly the same for zones and labels. The primary difference is that certification is a BloodHound Enterprise feature available for zones only. Unless you’re defining a rule as part of the zone or label creation process, be sure to select a specific zone or label on the Zone Builder page first.Open the Zone Builder page
- In the left menu, click Privilege Zones.
- Click the Zones or Labels tab and select a specific zone or label. If you don’t select a zone or label first, the new rule will be associated with the default zone or label selection when you open the page (top position in the Zones or Labels summary and detail view).
Configure rule details
- Click Create Rule.
-
Enter all relevant information for the rule:
Field Required? Description Name Yes A unique name for the rule (e.g., PCI Assets) Description No A brief description of the rule’s purpose and scope (e.g., PCI assets) Automatic Certification No Enterprise Edition An option to choose how BloodHound certifies new objects (available for zones only) Rule Type Yes The type of rule to use (e.g., Object ID or Cypher)
See Certification to learn more.
- Direct Objects: Only the objects directly matched by the rule are certified automatically (excludes objects added through expansion, such as OUs and GPOs). These objects are shown separately in the Sample Results panel.
- All Objects: Every object (including those tied to direct objects through expansion) is certified automatically
-
Off: All certification is manual
Rule type configuration details
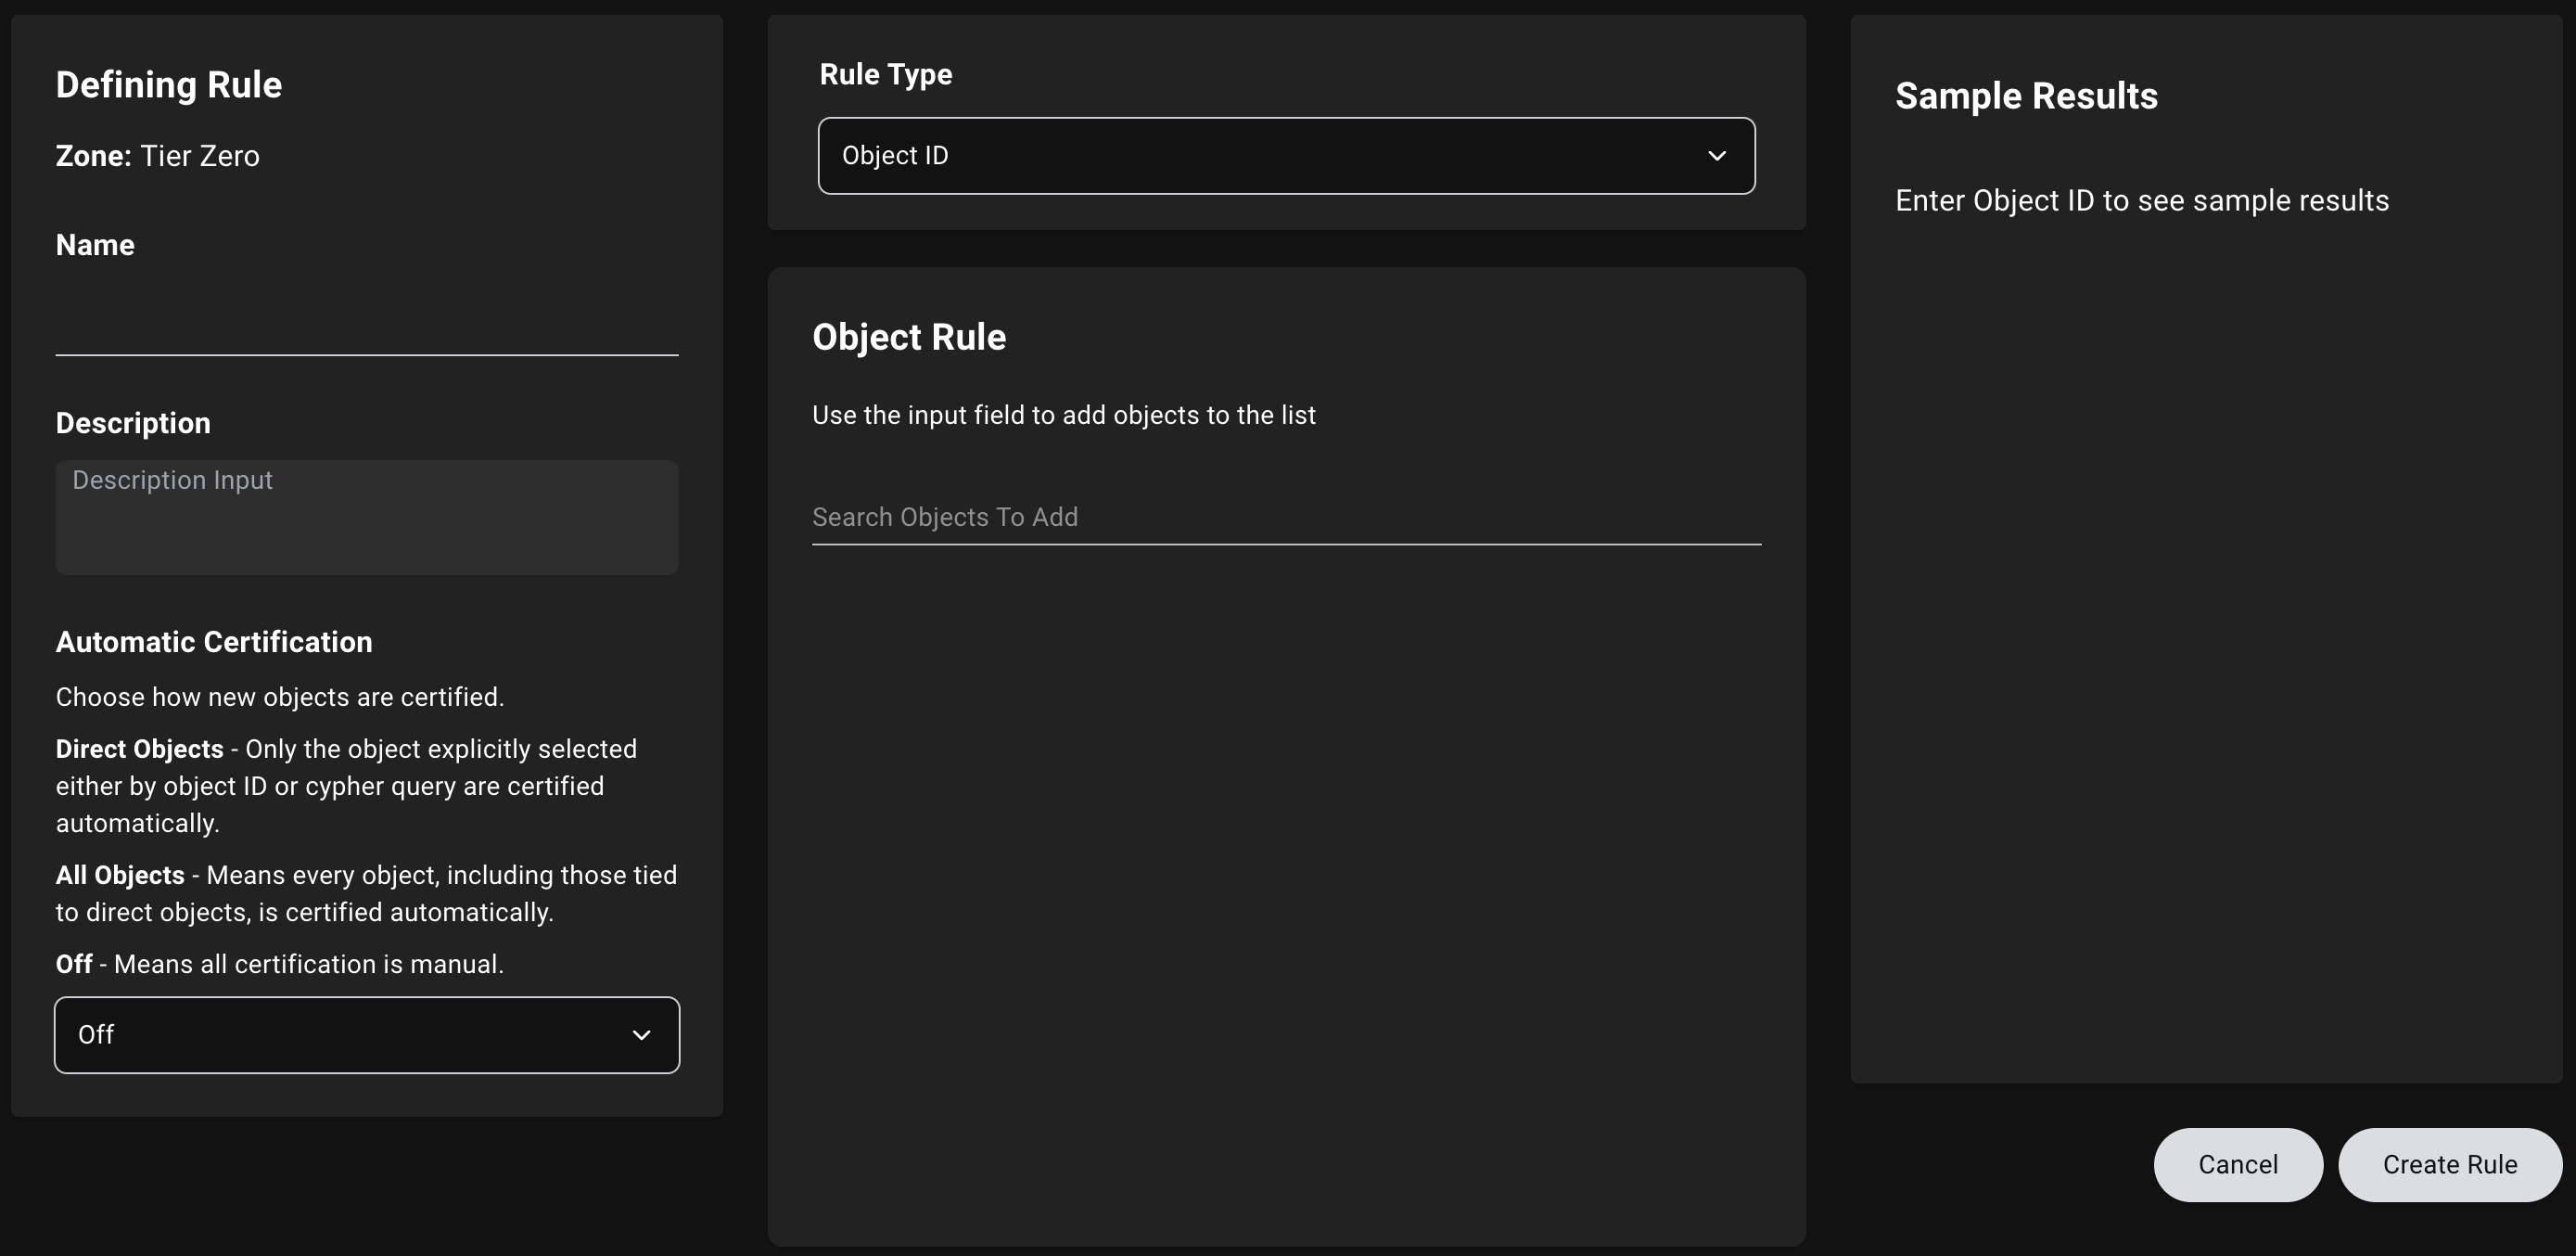 Adding the following object types automatically includes more objects according to the definition below. The Sample Results panel displays these expanded objects separately from the directly selected objects.
- Object ID
- Cypher
- In the Object Rule panel, type to search for an object by name or ID.
-
Click the object to add it to the list of targeted objects. You must select at least one object to create the rule.
The Sample Results panel displays up to 200 sample results, separating directly selected objects from objects selected through expansion. This helps you understand why your results may include more objects than initially expected.
If objects appear in the Sample Results panel during rule creation but don’t show in the zone after saving, see Zone precedence conflicts in the troubleshooting section below—a higher-priority zone may be claiming those objects.
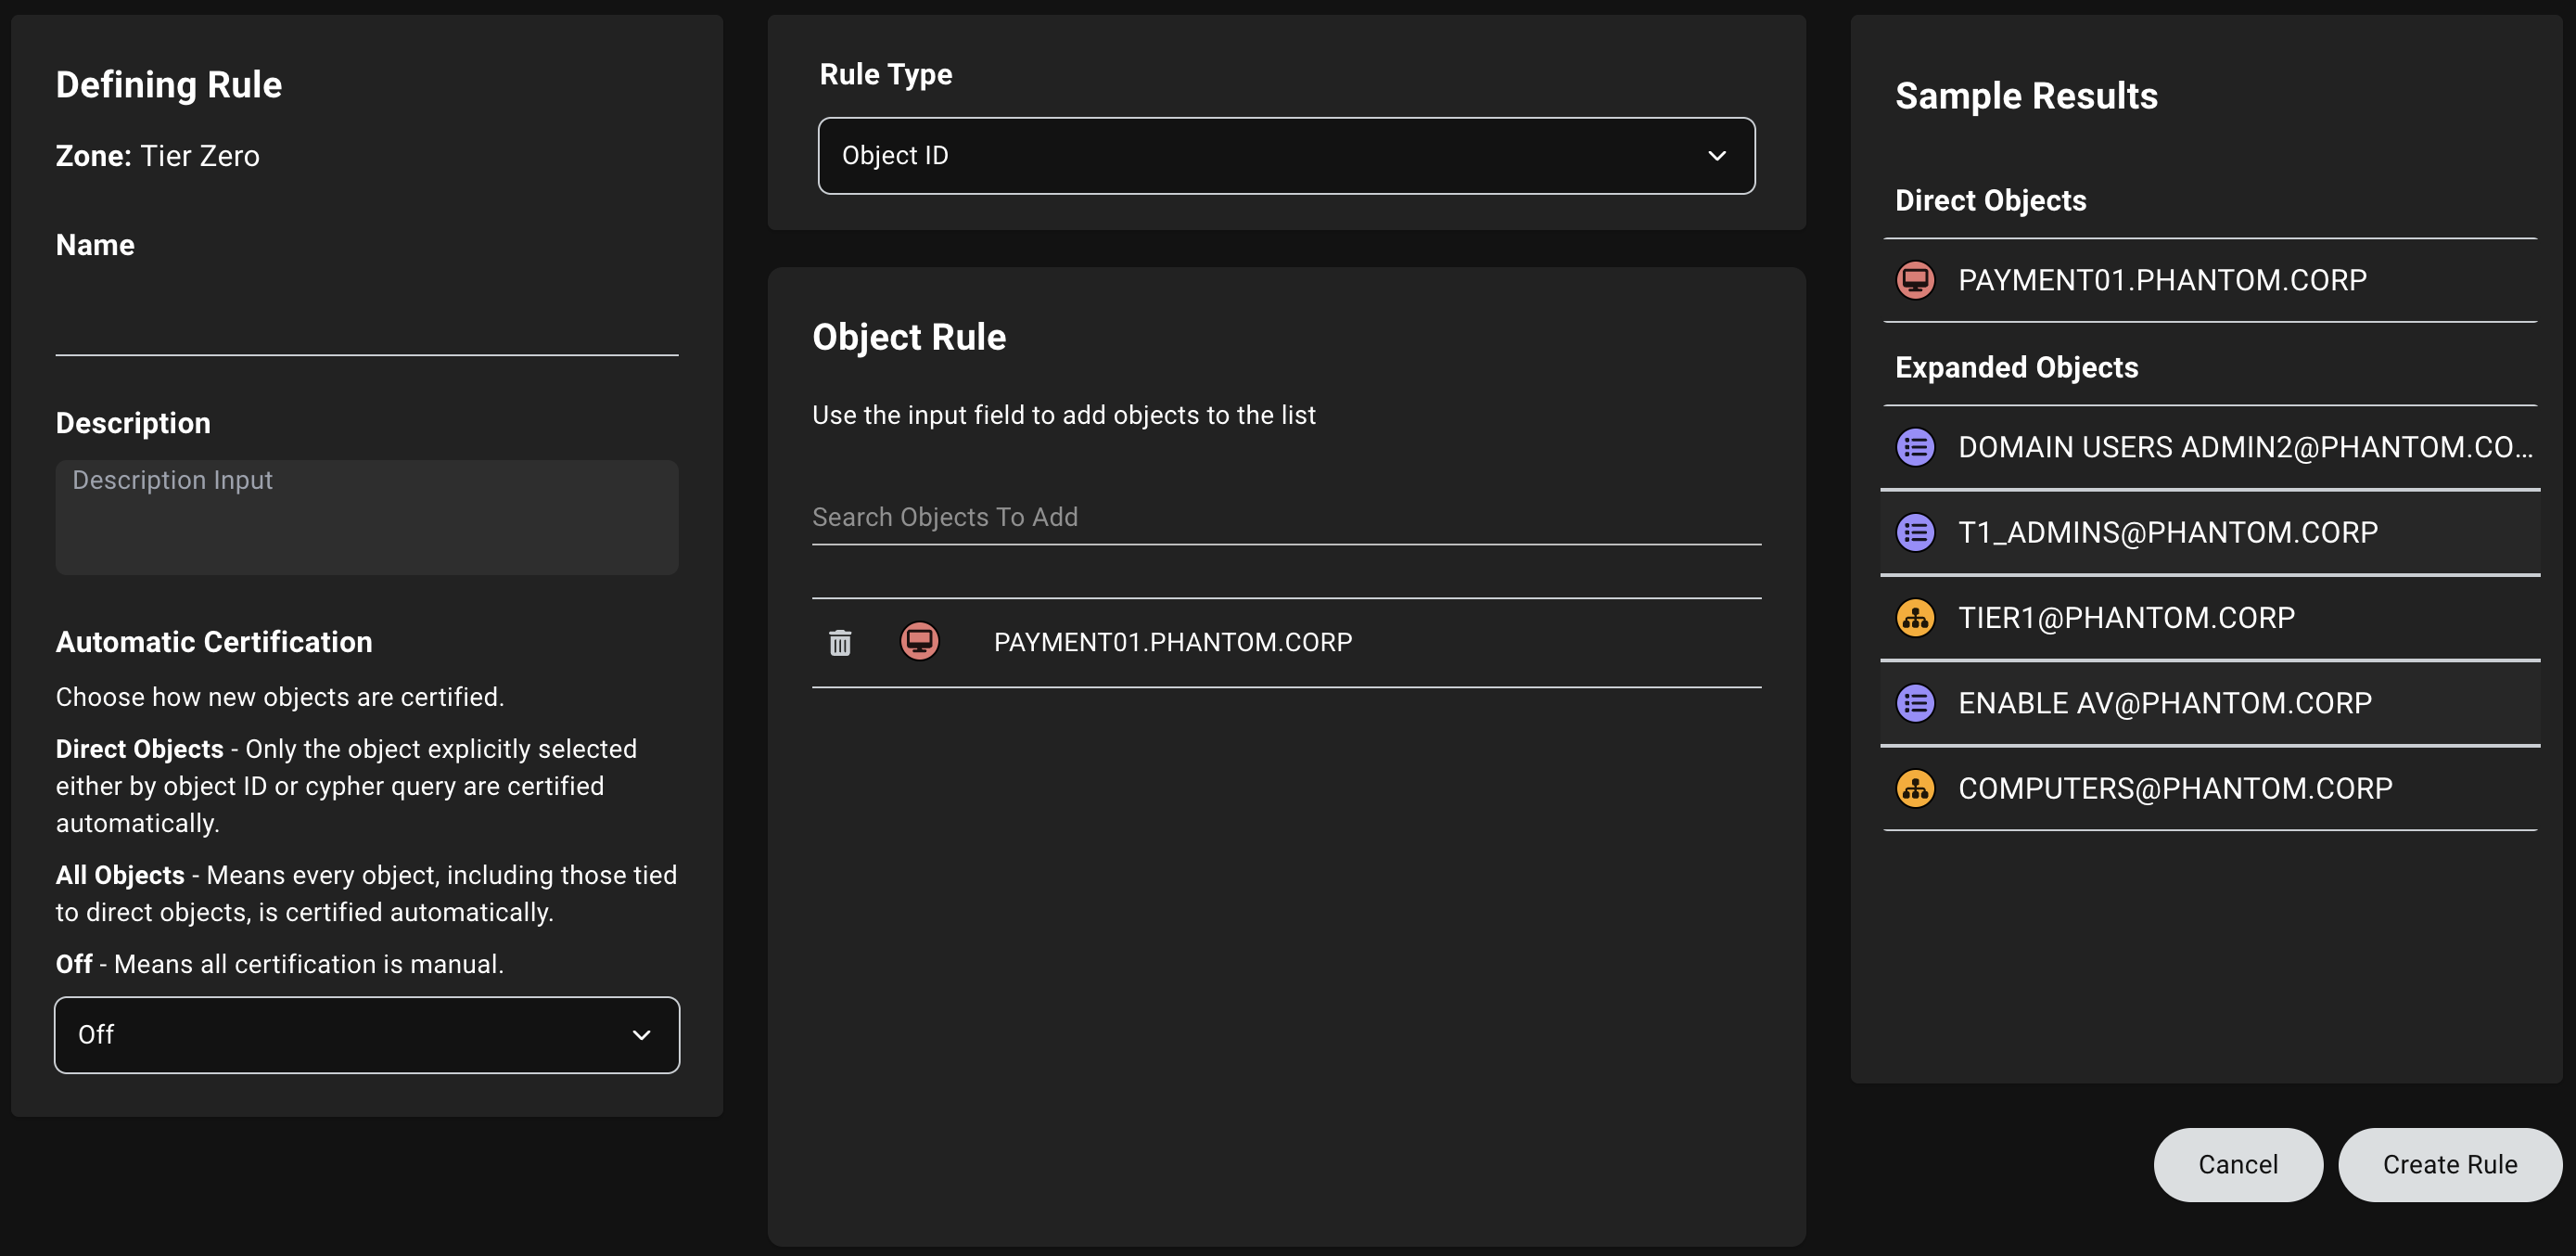
OU/Container→ All objects contained in the OU/containerGroup→ All objects with membership in the GroupAZResourceGroup/AZSubscription→ All objects contained in the RG/SubAZGroup→ All objects with membership in the groupAZRole→ All objects with role assignments (or eligibility)
Edit or delete a rule
To edit or delete a rule, follow these steps:Only users with the appropriate permissions can make changes. You cannot delete default rules.
Locate a rule
- In the left menu, click Privilege Zones.
- Click the Zones or Labels tab and open the Detail View.
- Select the zone or label that contains the rule that you want to edit or delete and select it.
-
Use one of the following methods to locate the rule you want to edit or delete:
- Method 1: Search by rule name
- Method 2: Search by object name or ID
- Enter the name of the rule in the search bar.
- Select the rule from the search results.
- Click Edit Rule to open the rule details.
Edit or delete a rule
Choose one of the following options:
- Edit a rule
- Delete a rule
To edit a rule:
Only users with the appropriate permissions can make changes. You cannot disable some default rules.
-
Make any necessary changes to the rule configuration.
For example, you can modify the rule’s name, description, rule type, and certification settings (available for zones only).
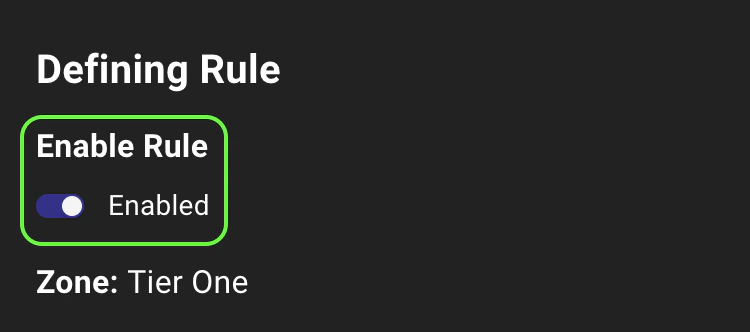
You can also disable or enable a rule by toggling the Enabled switch.
- Click Save Edits to apply your changes.
